

Most experiments require weather information to put environmental trends into context. So even though the majority of our sensor network is under ground, or under water, each study area includes a climate station on the surface. Our field sites are rarely close enough to government stations for their data to reflect local conditions because the official stations are spatially biased toward population centers and coastlines. As a result, we operate about ten weather stations and of the sensors they contain, tipping bucket rain gauges (TRGs) can be challenging to maintain at stations that only get serviced once or twice a year.
Where to spend your money
EVERYTHING exposed to full sunlight must be made of metal if you want it to last more than a year. I know there are plenty of tempting rain gauge designs at Thingiverse, but we’ve yet to see even hardened 3Dprints stand up to tropical conditions. This is also true for Stevenson screens, where I’d recommend a stack of metal bowls on stainless threaded rods (like that used by the Freestation project) over most of the pre-made ones on the market. Local varmints love using climate stations as chew toys.
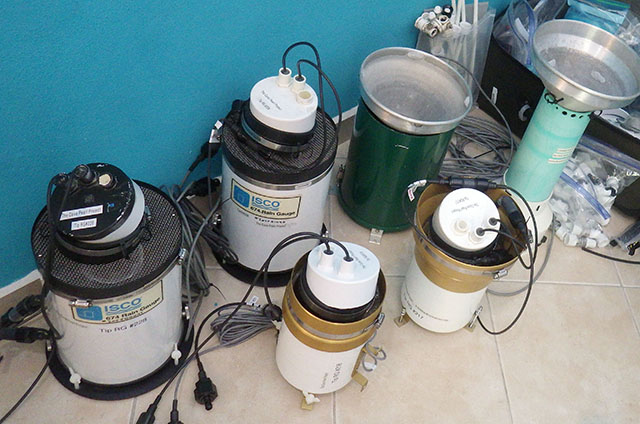
If you need one, then you actually need two. So long as you follow that first rule, it’s better to install two medium quality gauges rather than a single new one that eats your budget. When you’re replacing four to six gauges per year, lighter six inch diameter units are much easier to transport your the luggage. Be sure to have a receipt ready for import duty and even if you only paid $100 for that used gauge on eBay you can should expect an additional $100 getting it into another country. (and significantly more for some shiny new gauge that doesn’t have any scratches or dents on it yet) Another reason to double up is that you can pack them into different suitcases. When the airline loses a bag – which happens more often than you’d expect – you still have at least one to deploy. Finally, if you install dual TRG’s from the start of your project, you then have the option of temporarily re-allocating to singles if a tropical hurricane destroys half your stations.
A low budget hack that you can maintain is better than an expensive commercial solution that you can’t. Avoid any system with special unobtainium batteries or connectors that you can’t buy/repair at your fieldwork destination. That sweet looking ultrasonic combo you were drooling over at AGU was probably engineered for the US agricultural market, and may not work at all in Costa Rica. If you do start testing acoustic or optical rain sensors, then have a second low tech backup on the station beside it. Most methods have some sort of ‘blind spot’ where they generate inaccurate data and the only way to spot that is to have data from a different device to compare. Reed switches also have the advantage that they require no power to operate.


Location, Location, Location
Installation guidelines for weather stations usually make assumptions that only apply only in wealthy first world countries. This is hardly surprising given that even mid-range kit will set you back $1,000 and pro-level equipment can top $10,000 when you include the wireless transmitters & tripod mounting system. But our research almost never happens under such genteel conditions, so here’s my take on some of those serving suggestions:

- Place the weather station in an open area, free from obstructions such as trees or buildings, to ensure proper air flow and accurate wind measurements.
So what do you do if those open areas only exist at all because someone cut down trees to build? And anemometer measurements are only possible if your kit can stand being hit by several tropical storms per year. Not to mention the amount of unwanted attention they draw. Wind data is one of the few things we rely on government & airport stations for. - Choose a location with a stable and reliable power supply, or consider alternative power sources such as solar panels or batteries.
The expectation of reliable electricity / internet / cell phone reception is as humorous to a field scientist as the expectation of getting a hot shower every day. For more giggles, why not pop over to the next geo-sci conference in your area and ask them how long their solar powered station in Michigan ran before it was riddled with buckshot. Batteries are your only option, and the system should be able to run at least twice as long as your expected servicing schedule because things never go according to plan. - Locate the weather station in an area that is easily accessible for maintenance and repairs.
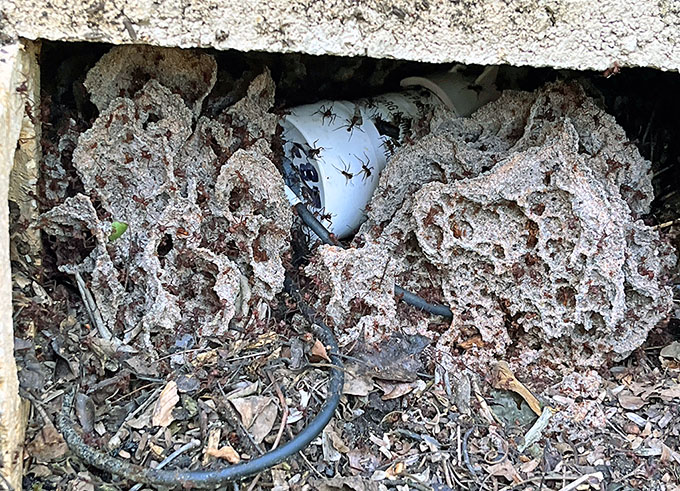
Even in areas that regularly get pummeled by hurricanes, vandalism/theft is our biggest cause of data loss. Any equipment within reach of passers-by will be broken or missing within a couple of months – especially if it looks like a scientific instrument. So it’s worth a good hike through dense jungle to protect your data, even if that makes the station harder to access. - Choose a location away from any artificial sources of heat, such as buildings or parking lots.
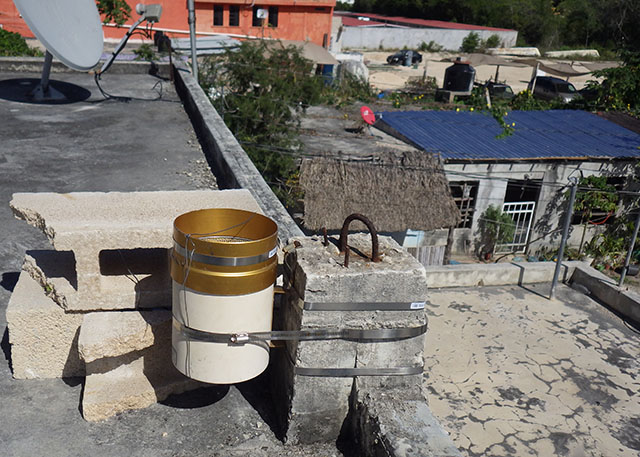
Rooftops are the only locations where we’ve managed to maintain long term stations because they are persistent, hidden from view, and the surrounding trees have been cleared. And in an urban environment…isn’t that, you know, the environment? Yes the thermal data is off because those rooftops go well over 45°C, but temperature is the easiest data to get from tiny little loggers that are more easily hidden at ground level. - Consult with local authorities and meteorological agencies to ensure that the location meets any necessary standards or regulations.
A solid long-term relationship with the land owner, and your other local collaborators is vital for any research project, but don’t expect local authorities to make time for a friendly chat about your climate station. NGO’s are usually run by volunteers on shoe-string budgets so they’ll be grateful for any hard data you can provide. However, those same groups are often a thorn in the paw of the previously mentioned authorities. Threading that needle is even more complicated when some NGO’s are simply development blockers for large landowners waiting for property values to rise high enough for their own development project to become profitable. In addition to significant amounts of paperwork, public lands suffer from the problem that legislation & staff at the state/territory level can change dramatically between election cycles, sometimes to the point of banning research until the political wind starts blowing in a different direction.
Maintenance
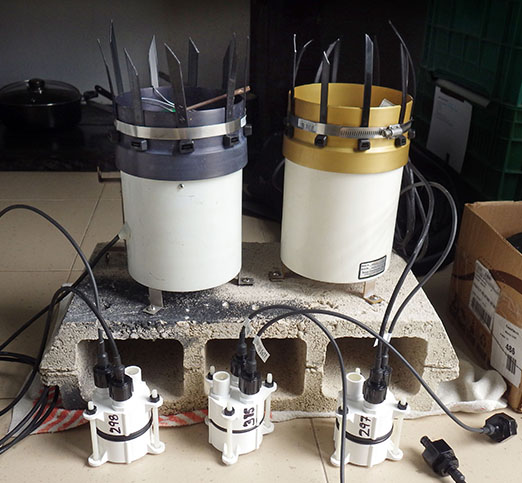
The best maintenance advice is to have separate loggers dedicated to each sensor rather than accumulating your data on one ‘point of failure’ machine, especially when DIY loggers cost less than the sensors. We try to bring enough replacement parts that any site visit can turn into a full station rebuild if needed.


Like bird spikes and debris snorkels, there are several commercial solutions for calibrating your gauge but you can also find 3d printable models for constant flow Mariotte bottle rigs in the open source literature. In a pinch your can do a field check simply by poking a tiny pin-hole in a plastic milk jug or coke bottle filled with 1 litre of water from a graduated cylinder. Placing this on the funnel of a rain gauge gives a slow drip that generally takes about 30 minutes to feed through. The slower you run that annual test the better, and ideally you want an average from 3-5 runs. Of the many gauges we’ve picked up over the years, I have yet to find even new ones that aren’t under-reporting by 5-10% and it’s not unusual for an old gauge to under-report by 20-25%, relative to its original rating. Leveling your installation is always critical, but this can be difficult with pole mounted gauges. In those cases you must do your calibration after the gauge is affixed. I rarely move the adjustment stops on a gauge that’s been in place for a couple of years even if the count is off, because that’s less of a problem to deal with than accidentally shearing those old bolts with a wrench.
The Data
Rain gauges have large nonlinear underestimation errors that usually decrease with gauge resolution and increase with rainfall rate – especially the kind of quick cloud-burst events you see in the tropics. Working back from the maximum ranges, you’ll note that few manufacturers spec accuracy above two tips per second. So that’s a reasonable ‘rule of thumb’ limit for small gauges with plastic tippers that will plateau long before larger gauges with heavier metal tipping mechanisms. Gauge size is always a tradeoff between undercounting foggy drizzles at the low end (where smaller tippers are better) or undercounting high volume events (where larger gauges generally perform better). Even if you hit the sweet spot for your local climate, storms can be so variable that a perfectly sized & maintained gauge still won’t give you data with less than 15% error for reasons that have little to do with the gauge itself.

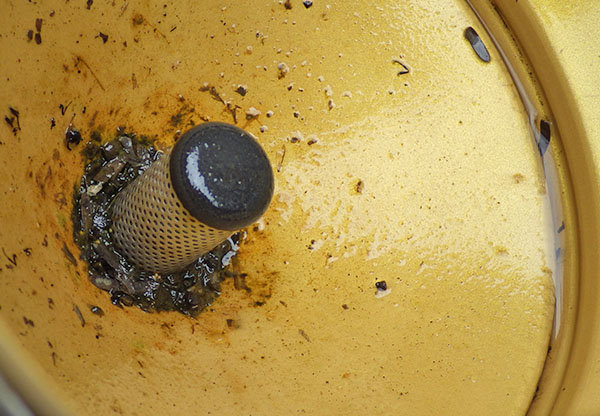
All that’s to say your analysis should never depend on rainfall the way you might rely on temperature or barometric data. More records, from more locations, always gives you a better understanding of site conditions than ‘accurate’ data from a single location. Of course, that gives you the “man with two watches” problem when one of the gauges is in the process of failing. The most difficult situation to parse is where something slowly plugs one of the funnels but both gauges are still delivering plausible data. A signature of this kind of fail is that one gauge of a pair starts delivering consistent tip rates per hour during events while the other gauge shows larger variation. An alarm bell should go off in your head whenever you see flattened areas on a graph of environmental data:
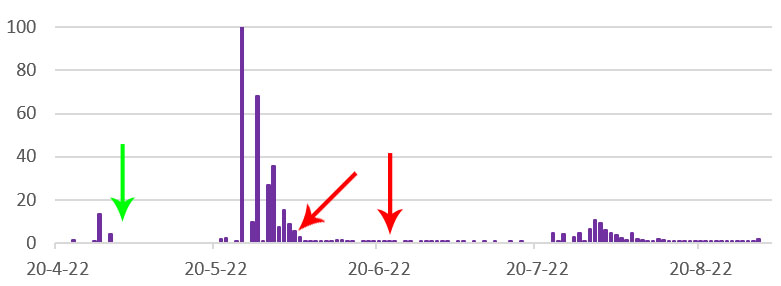

These problems are much easier to sort out if both of the gauges at a given station are calibrated to the same amount of rainfall per tip (usually 0.01inches or 0.2mm) and disappear entirely if you have three records to compare.
While I’ve been critical of the cheap plastic tippers you find in home weather station kits they still have a place for budget EDU labs, and I’ve more than a few in my back garden feeding data into prototypes for code development. A new crop of metal & plastic hybrid gauges have started appearing on Amazon/eBay for about $150. The build quality seems a bit dubious, but we are going to give them a try this year anyway to see if they can serve as backups to the backups. As they say in the army: “Quantity has a quality all it’s own”. I wonder if any citizen science projects out there could adopt that motto?
Addendum: 2023-04-17
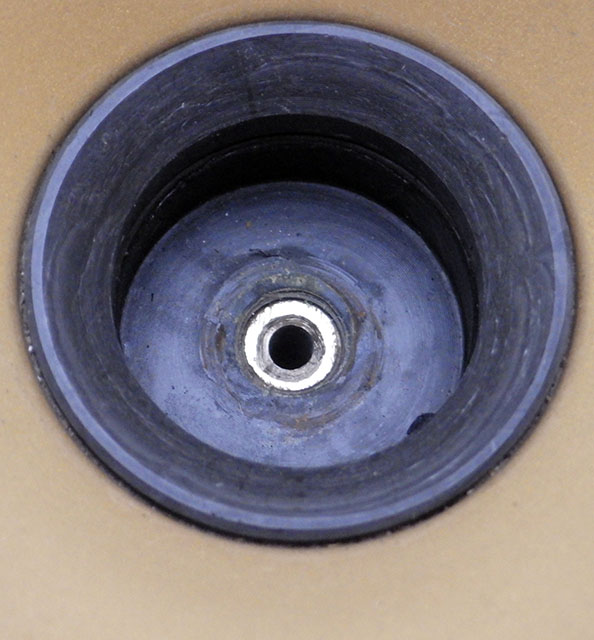
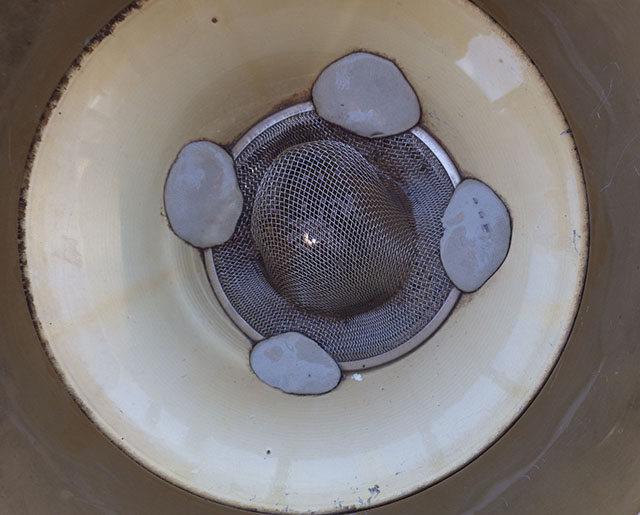
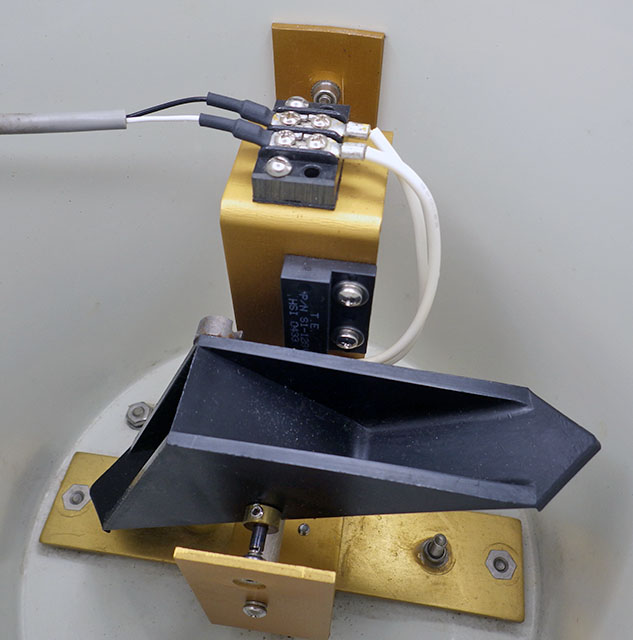
As luck would have it, that cheep Chinese gauge arrived from Amazon the day after I made this post. I wasn’t expecting much from a $150 rain gauge, but this one turned out be such an odd duck that I’ll include it here as a warning to others. On the right you see a photo from the listing, which made me think both the body and the funnel were made from brushed metal. What actually arrived made it clear the whole listing was carefully crafted to hide some pretty serious designs flaws.
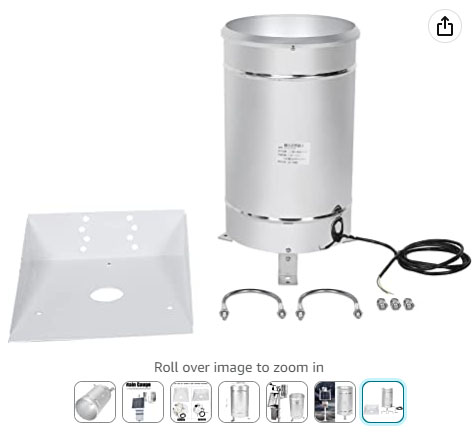

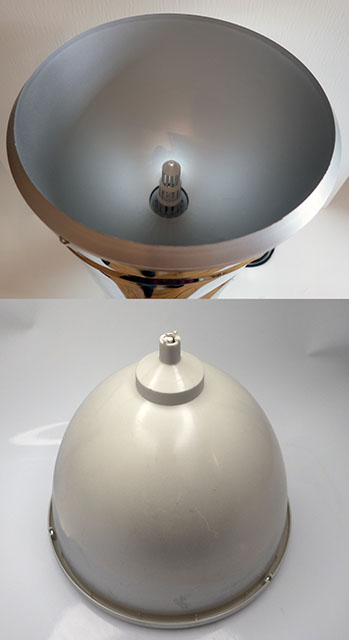
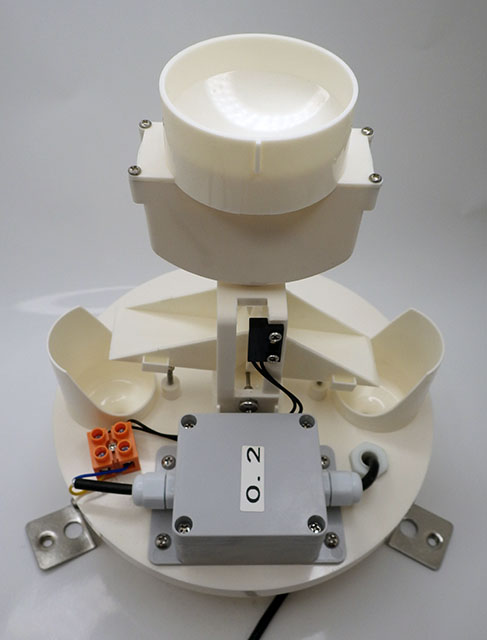
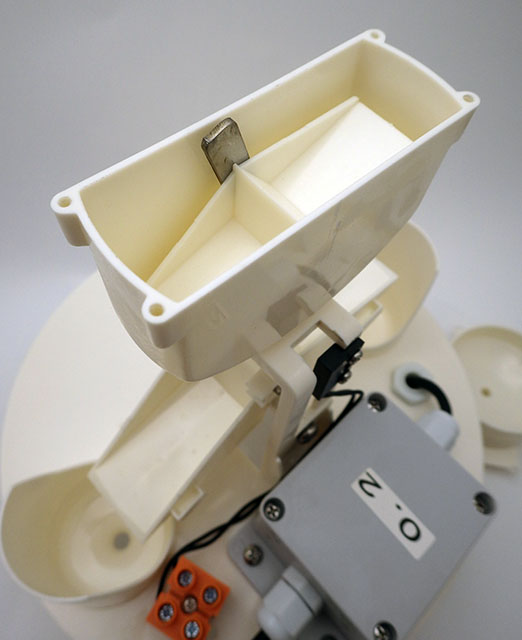
The thing that makes this such a good example of bad engineering is that they first optimized production cost with cheap brittle plastic that will likely fail with a year. As a result, the tipper ended up so light that they had to add a second funnel & tipping mechanism to deal with the momentum of drops falling from the main funnel. That upper mechanism is so small it’s guaranteed to plug up with the slightest amount of debris – causing the unit to stop working even before the plastic starts to crack. If they had simply added that extra material to a larger, heavier bottom tipper the upper mechanism wouldn’t have been necessary.
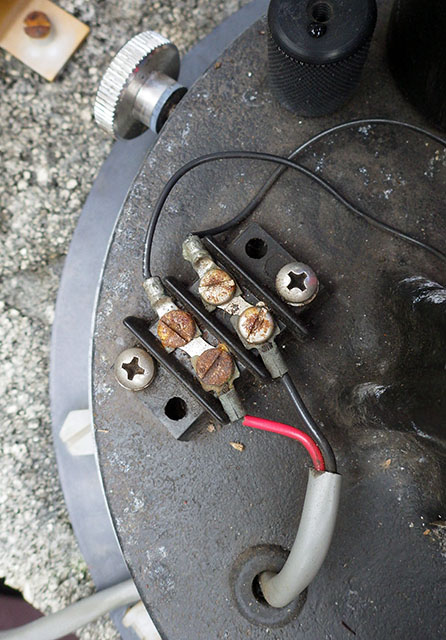
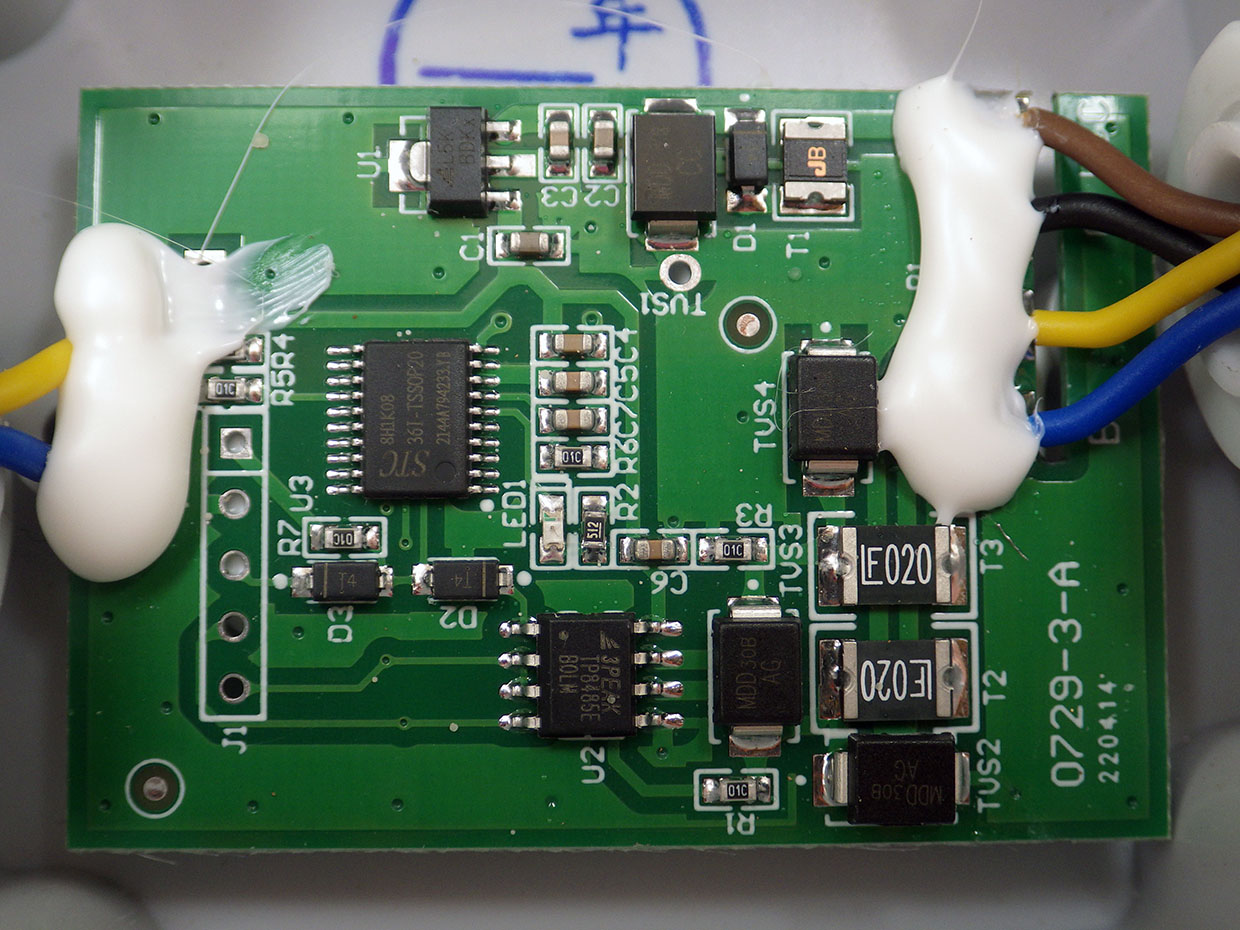
What takes this from merely bad to actually funny was the inclusion of an “Intelligent rainfall monitoring system for data upload via Ethernet, GPRS and RS485”. I presume that was intended to connect with ‘industry standard’ meteorological stations but who’d tack a cheap sensor like this onto one of those $1000+ loggers? Even stranger to me is the idea you’d waste that much power on a simple reed switch. Fortunately there is a terminal block where you can bypass that all that baggage, though that’s also fragile to the point of single-use.
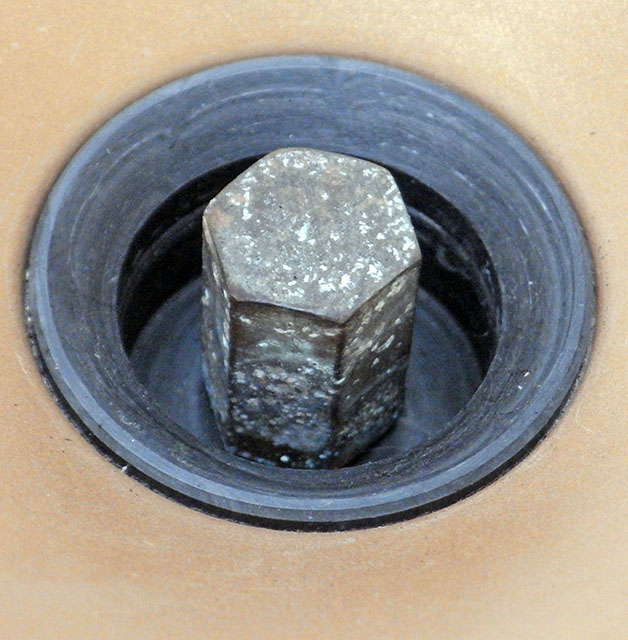
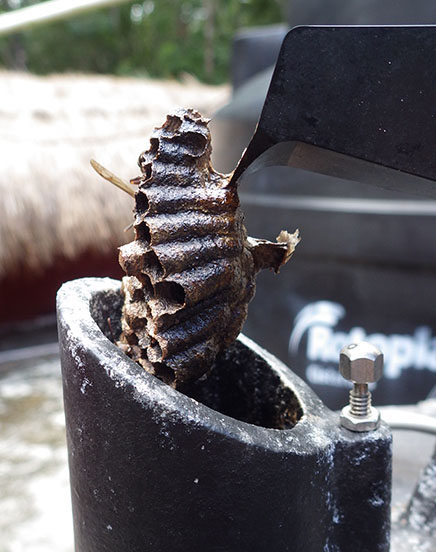
Bottom line is that you are better off buying a used unit from a quality manufacturer than you are getting a new one from a company that doesn’t have a clue what they are doing. For comparison, here’s how the mechanisms inside decent gauges look:


Hi there thanks for posting your article regarding the tipping buckets. Though I’d reach out and show you a bucket that i am working on for Hydroponics. We measure the outflow from the growing bags to indicate when the plants are feeding at particular times due to the media being dryer and accepting more moisture. The one we use the most is 50mL per tip. Anyway just a quick hi and ofcourse let me know if you want to know more, i am.happy to share my experiences.
Regards Mark Hill
That sounds like an interesting application for rain gauges! Though for us the main issue is how to make these things more rugged. I should have included more of the surrounding rooftops in the post photos, as that would have shown the large number of branches scattered nearby. During the bad storms branches between 1-2 inches in diameter & up to a meter long are flying though the air. Most houses have frames around their house windows so they can quickly slide in sheets of plywood to protect them during the storms that hit 2-3 times a year. Almost everybody looses a car windshield from time to time. So we are probably at the far end of the spectrum compared to your precision work with these gauges.